Connecting an IONOS domain to Shopify
If you purchased a domain from IONOS and want to use it on a Shopify store without moving the hosting to Shopify, then this guide will help you manually connect your IONOS domain to Shopify.
On this page
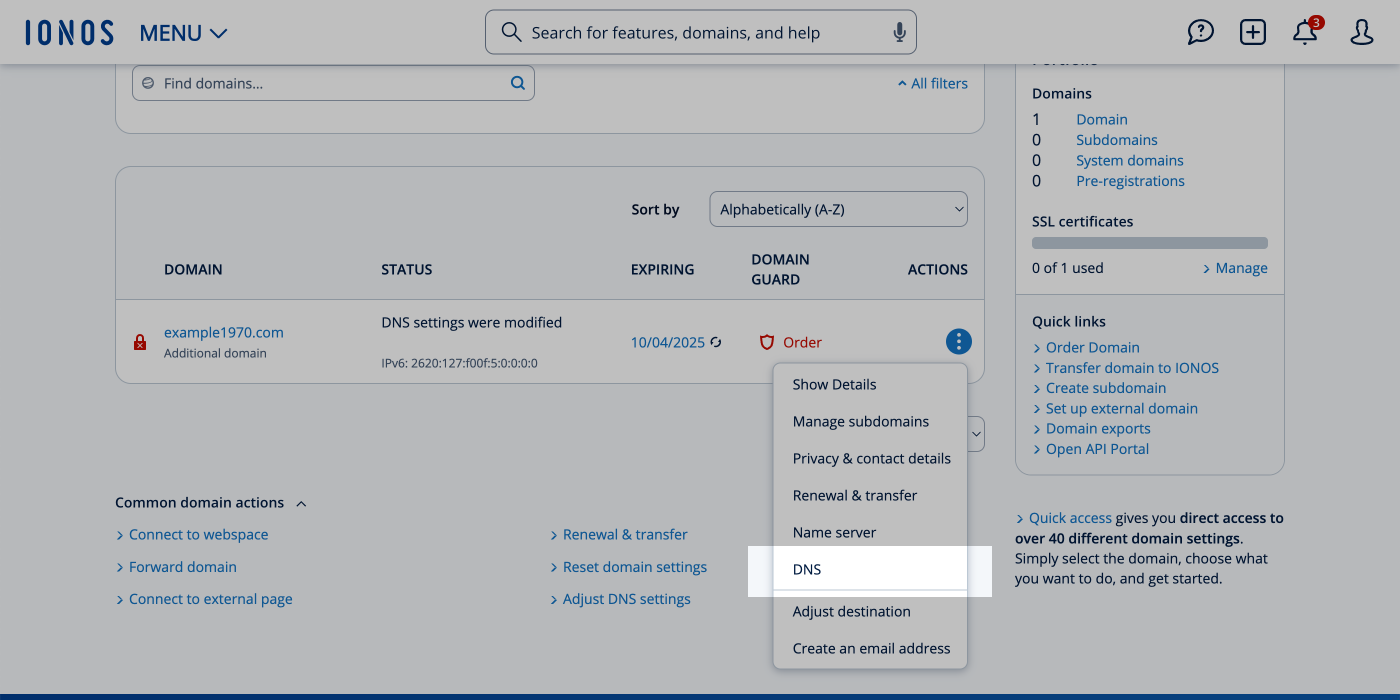
Step 1: Log in to your IONOS account
- Open a new browser tab and log in to your IONOS account.
- Go to Menu > Domains & SSL.
- Select the domain that you want to connect to Shopify.
- Click Actions > DNS.
Step 2: Update the A records
- Locate the A record, and then click Edit.
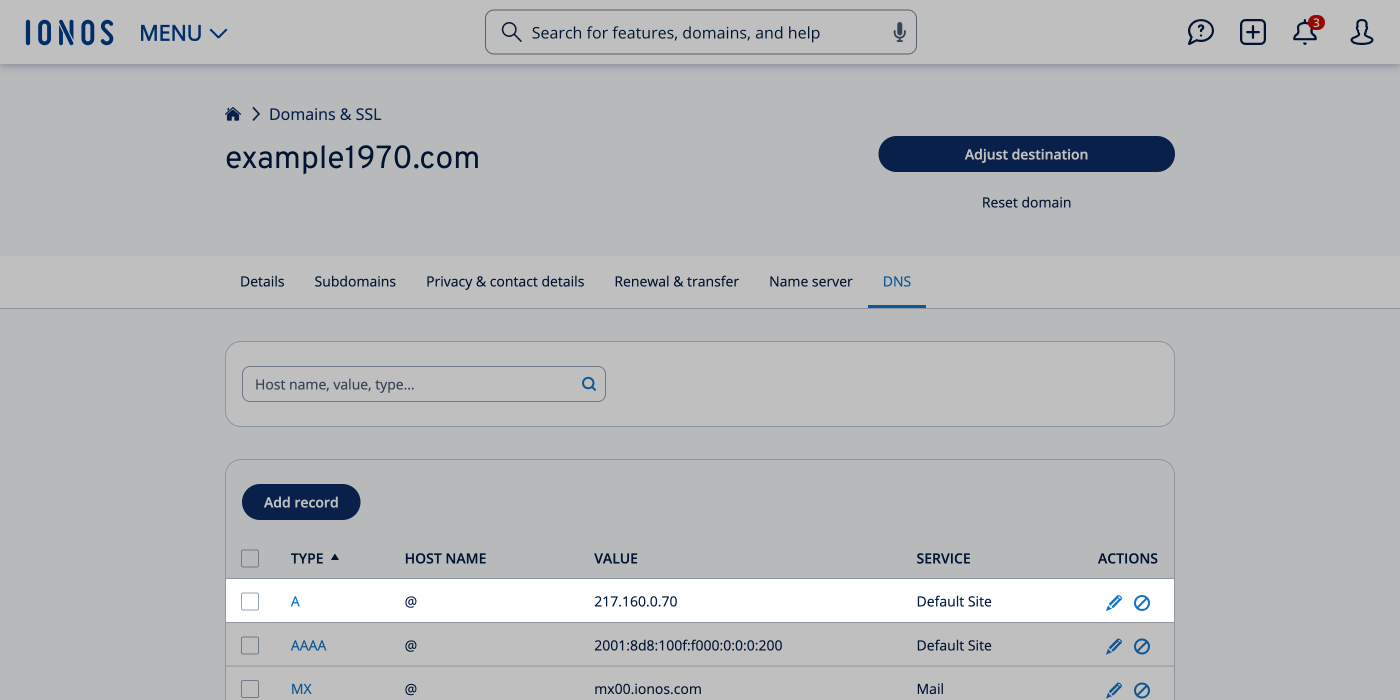
- Match the following A record to your DNS settings:
- Type: A
- Host name: @
- Points to: 23.227.38.65
- TTL: 1 hour
- Click Save.

Step 3: Add the CNAME records
- Click Add record, and then select CNAME from the list.
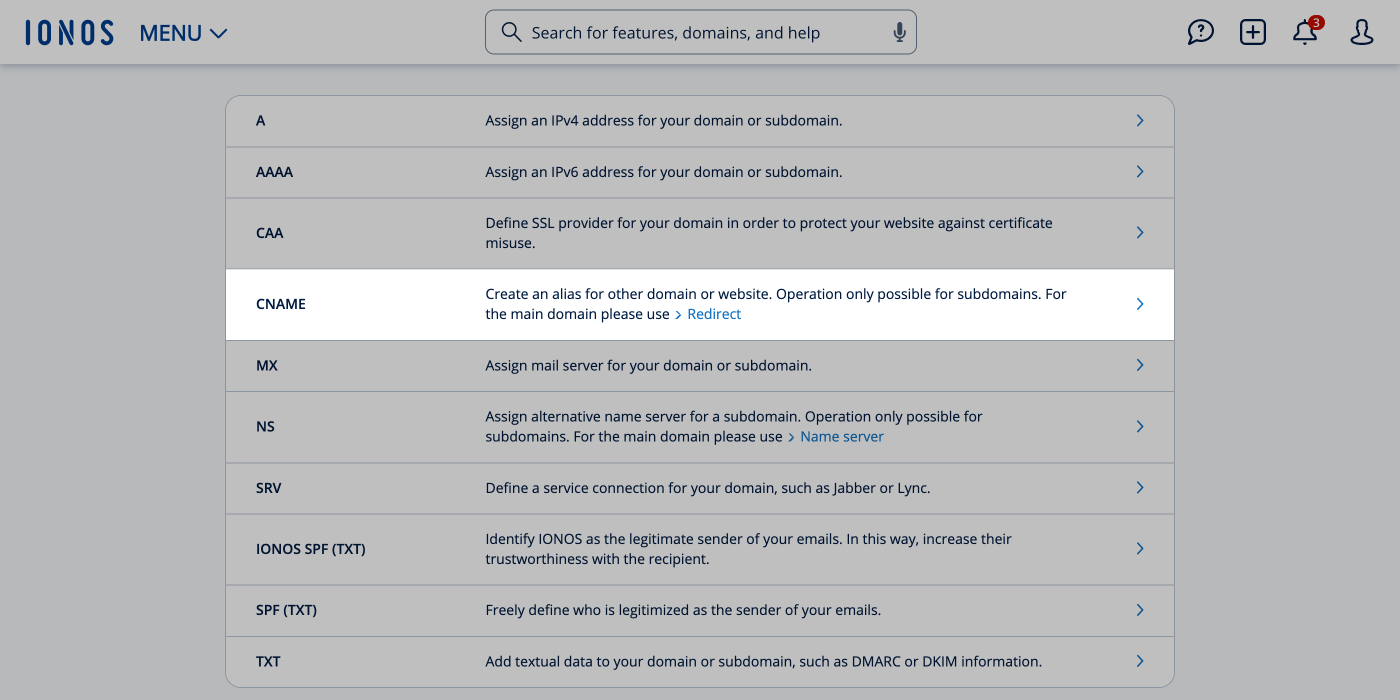
- Match the following CNAME record to your DNS settings:
- Type: CNAME
- Host name: www
- Points to: shops.myshopify.com
- TTL: 1 hour
- Click Save.

Step 4: Connect your domain to Shopify
- From your Shopify admin, go to Settings > Domains.
- Click Connect existing domain.
- Type the name of the domain that you want to connect, and then click Next.
Step 5: Verify connection
- Click Verify Connection. Your domain will start the verification process, which can take up to 48 hours.
- After your domain is verified, it will be displayed as connected on the Domains page in your Shopify admin.
Troubleshooting
If the message 'This domain is already connected to another Shopify store is displayed', then you need to verify your domain ownership. Learn more about troubleshooting issues with domains connected to Shopify.