Set up drop-down menus in your online store
You can use drop-down menus to group products, collections, or pages together and make it easier for customers to navigate your online store. For example, if you have a lot of products then you might want to add them to collections and then use a drop-down menu from the main menu to organize the collections. This can help a customer to find the type of products that they're looking for.
You can also add, remove, or edit menu items in drop-down menus, or in your default menus.
You can view and change your online store menus from the Menus page in your Shopify admin.
Nesting menu items to build drop-down menus
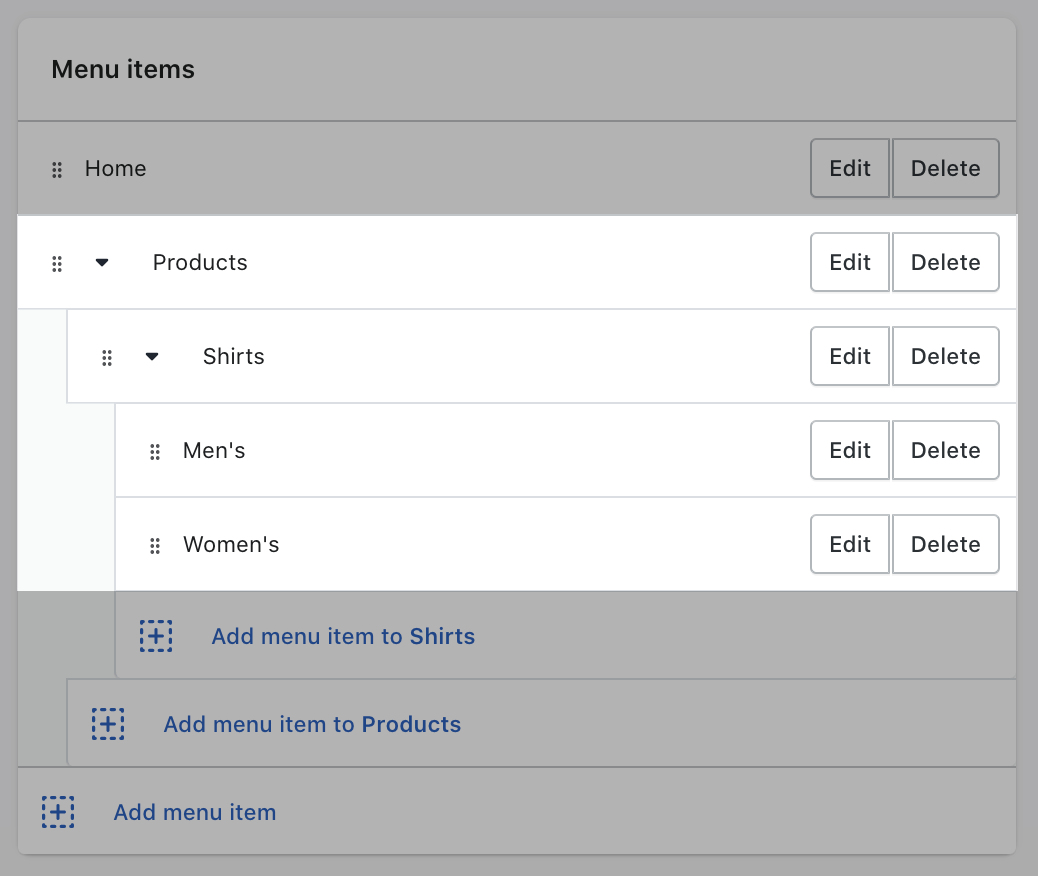
You can build drop-down menus by creating or moving menu items so that they're nested below a top-level item. The top-level item displays in the main menu on your online store, and the nested menu items display in a drop-down menu. The top-level item can have up to two levels of nested drop-down menus.
All themes will display nested items as drop-down menus from the main menu, and some themes will display nested items as drop-down menus in other locations.
The appearance and location of the main menu and drop-down menus in your online store depend on your theme. Some themes will display an icon beside the name of a drop-down menu in the main menu to help customers recognize that a drop-down menu is there.
Add a drop-down menu from the main menu
You can add a drop-down menu from any of the menu items in the main menu.
Steps:
Desktop
From your Shopify admin, go to Content > Menus.
Click the name of your main menu.
Choose one of the main menu items to be the header for your drop-down menu, or add a new menu item to be the header. If you don't want the header to link to anything, then you can enter
#
in the Search or paste a link field for the header menu item.-
To add a menu item to include in the drop-down menu, complete the following tasks:
- Click Add menu item.
- In the Name field, enter a name for your menu item.
- In the Search or paste a link field, enter or select a destination for your menu item.
Click Add, and then click and drag the menu item to nest it below the header menu item.
Click Save menu.
iPhone
- From the Shopify app, tap the … button.
- Tap Content > Menus.
- Tap the name of your main menu.
- Choose one of the main menu items to be the header for your drop-down menu, or add a new menu item to be the header. If you don't want the header to link to anything, then you can enter
#
in the Search or paste a link field for the header menu item. - To add a menu item to include in the drop-down menu, complete the following tasks:
- Tap Add menu item.
- In the Name field, enter a name for your menu item.
- In the Search or paste a link field, enter or select a destination for your menu item.
- Tap Add, and then tap and drag the menu item to nest it below the header menu item.
- Tap Save.
Android
- From the Shopify app, tap the ☰ button.
- Tap Content > Menus.
- Tap the name of your main menu.
- Choose one of the main menu items to be the header for your drop-down menu, or add a new menu item to be the header. If you don't want the header to link to anything, then you can enter
#
in the Search or paste a link field for the header menu item. - To add a menu item to include in the drop-down menu, complete the following tasks:
- Tap Add menu item.
- In the Name field, enter a name for your menu item.
- In the Search or paste a link field, enter or select a destination for your menu item.
- Tap Add, and then tap and drag the menu item to nest it below the header menu item.
- Tap ✓.