Set up drop-down menus in your online store
You can use drop-down menus to group products, collections, or pages together and make it easier for customers to navigate your online store. For example, if you have a lot of products then you might want to add them to collections and then use a drop-down menu from the main menu to organize the collections. This can help a customer to find the type of products that they're looking for.
You can also add, remove, or edit menu items in drop-down menus, or in your online store's default menus.
You can view and change your online store navigation from the Navigation page in your Shopify admin.
Nesting menu items to build drop-down menus
You can build drop-down menus by creating or moving menu items so that they're nested below a top-level item. The top-level item displays in the main menu on your online store, and the nested menu items display in a drop-down menu:
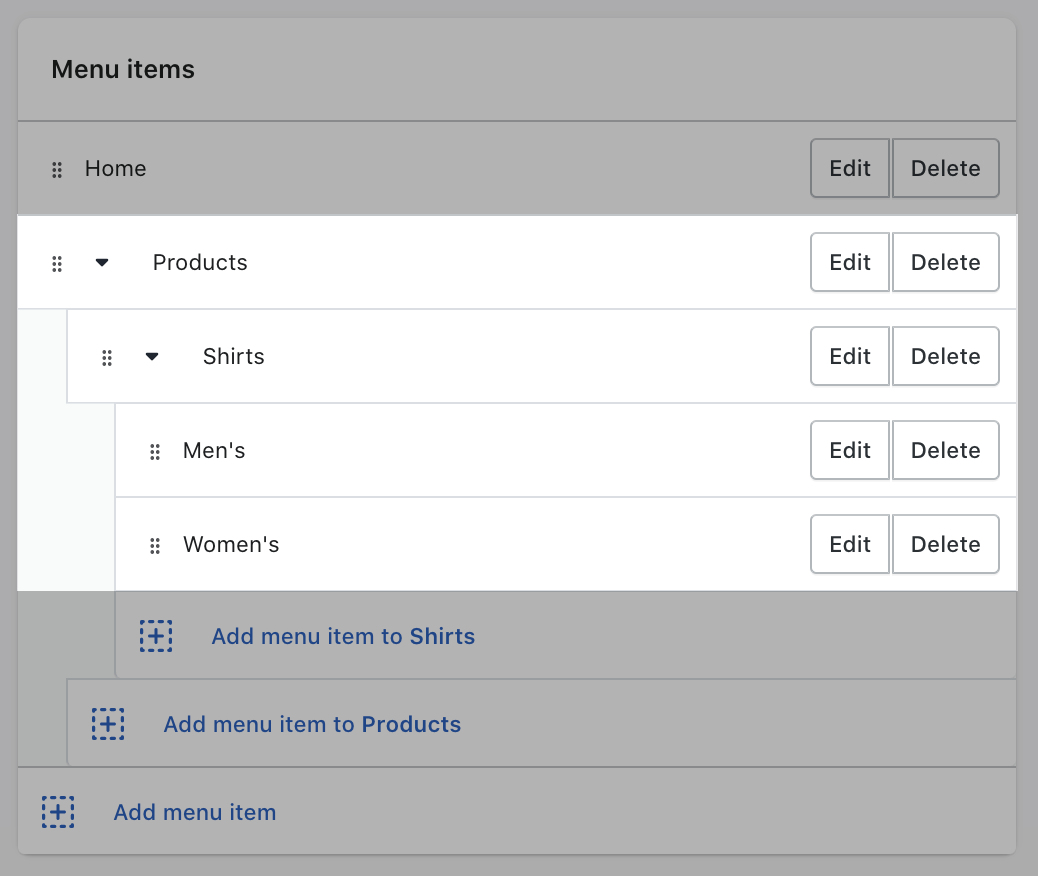
The top-level item can have up to two levels of nested drop-down menus.
All themes will display nested items as drop-down menus from the main menu, and some themes will display nested items as drop-down menus in other locations.
The appearance and location of the main menu and drop-down menus in your online store depend on your theme. Some themes will display an icon beside the name of a drop-down menu in the main menu to help customers recognize that a drop-down menu is there.
You can add a drop-down menu from any of the menu items in the main menu.