Creating GLB files using 3ds Max and Substance Painter
Use 3ds Max and Substance Painter to export a GLB file that can be added to a product in the Shopify admin.
On this page
Prepare your model for export in 3ds Max
To prepare your model for export, you need to make sure that it's a single mesh and that it has a single material applied to it.
Steps:
- Click File > Import... > Import...
- Select your model file, and then click Open.
- In the OBJ Import Options dialog, check Import as a single mesh.
- Click Import.
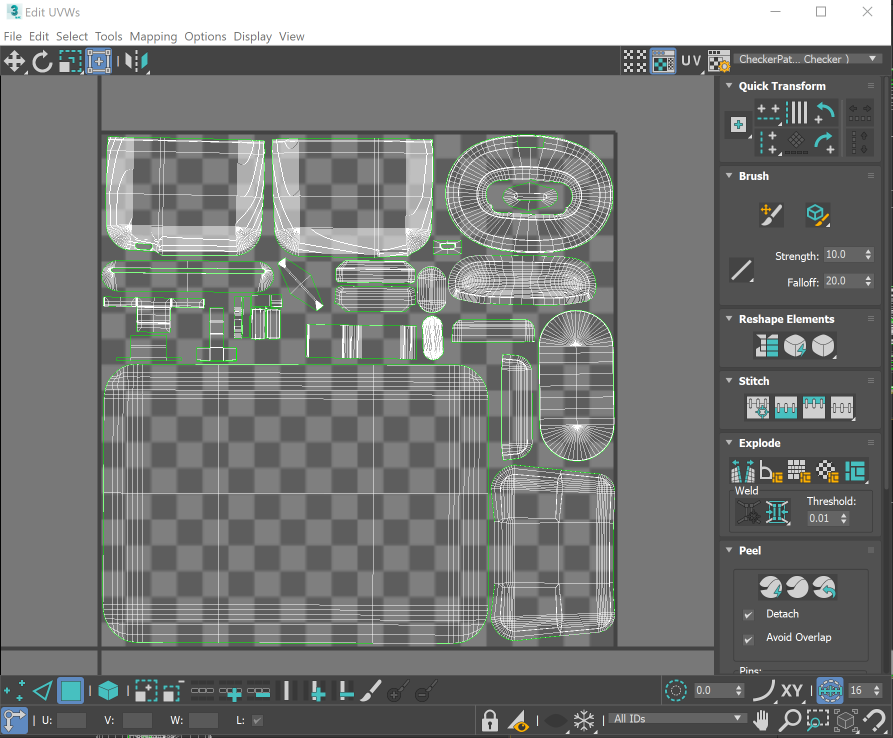
- Unwrap the model into 0-1 space. Make sure that no UVs overlap:
- Apply a single material to the entire model.
Export the mesh from 3ds Max
- Click File > Export > Export...
- Enter a file name and the location where you want to export the model.
- From the Save as Type drop-down menu, select OBJ-Export (.OBJ).
- Click Save.
- In the OBJ Export Options dialog, leave the default options as they are and click Export.
Import and prepare the OBJ file in Substance Painter
- Create a new Substance Painter project by clicking File > New.
- In the New project dialog, click Select to choose a mesh.
- Select the OBJ file that you exported from 3ds Max, and then click Open.
- In the New project window, click OK.
- Verify that you correctly exported your mesh by checking that there's only one texture set in the Texture set list panel.
- If you see more than one texture set, then see Multiple texture sets.
- In the Texture set settings panel, click the
+button to add channels: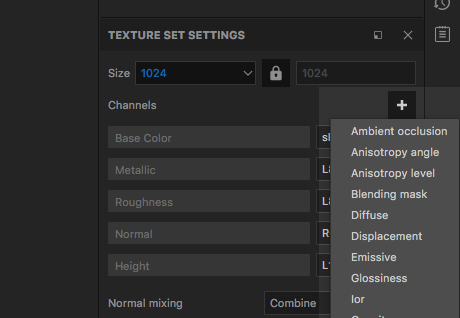
- Required: Ambient occlusion.
- Optional: Emissive. Add this channel if your model has components that will emit light.
- Optional: Opacity. Add this channel if your model has components that will be transparent.
- In the Texture set settings panel, click Bake Mesh Maps.
- Paint textures on to the model.
Multiple texture sets
When you import the OBJ file into Substance Painter, you should see only one texture set: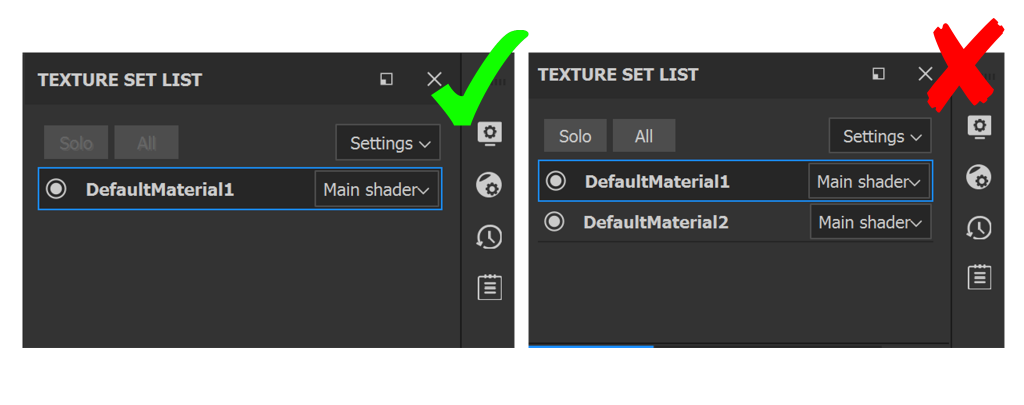
If you see more than one texture set, then one of the following was wrong when the mesh was exported from 3ds Max:
- The mesh wasn't combined into a single object.
- The mesh had more than one texture assigned to it.
If that's the case, then export your model from 3ds Max again and make sure that the mesh is a single object and has only a single texture assigned to it.
Export the glTF file from Substance Painter
- Click File > Export Textures.
- From the Config drop-down menu, select glTF PBR Metal Roughness.
- Choose the location where you want to save your textures.
Choose a document size to determine how large the texture files will be.
Click Export.
Compressing texture files
When you have exported the model, you should have the following files:
- modelName.bin
- modelName.glb
- modelName.gltf
- modelNamebaseColor.png
- modelNamenormal.png
- modelName_occlusionRoughnessMetallic.png
When using the glTF PBR Metal Roughness configuration, Substance Painter exports texture files only in PNG format. Consider compressing the texture files and converting any textures that don't need an alpha channel to a JPG. This reduces the total file size, and smaller file sizes allow for quicker download speeds and smoother interactions.
It's best to keep your file size to 4 MB or smaller.
Create a GLB file
- Visit https://glb-packer.glitch.me/.
- Drag and drop the files that you exported from Substance Painter on to the GLB Packer web page.
A file called out.glb will be downloaded to your computer. After the download is complete, you can rename the file and then upload it to Shopify.