No code 3D viewer configuration
You can configure your 3D models in your Shopify admin without needing to edit any code. Adjust the lighting, background color, exposure level, zoom, and initial camera view of your model from your Products page.
On this page
Edit a 3D model
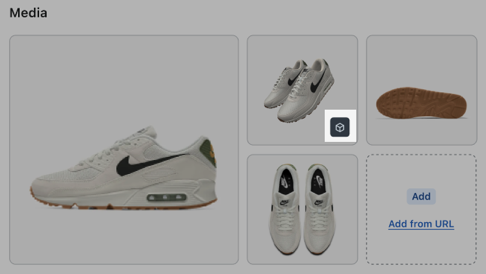
You can adjust the Lighting of your 3D model, or the Camera view. To access the 3D model editor, open a product that contains a 3D model. Scroll down to the Media section on the product page, and click the 3D icon in the image.

Edit model lighting
- Open your Products page and select a product that contains a 3D model.
- Scroll down to Media in the product. Locate the 3D model and click the 3D icon in the image.
- Click Edit file. By default, the Lighting edit options are loaded first. Select the type of editing you want to do:
- Environment has pre-set filters that change the shadows and reflections that appear on your image. Click any filter to see how it affects your image.
- Lighting allows you to change the exposure of your 3D image. Use the slider to adjust the image exposure.
- Background changes the background color of your 3D image. You can set the image background to be transparent by selecting the Use transparent background box. Select a background color for your image with the color picker, or enter the hex code for the color in the field below the color picker.
- After editing your file, click Done to save your changes or click Reset to return the image to its original state.
Edit model camera view
- Open your Products page and select a product that contains a 3D model.
- Scroll down to Media in the product. Locate the 3D model and click the 3D icon in the image.
- Click Edit file. Click the Camera icon to load the model's view options.
- Select the type of editing you want to do:
- Change the X Rotation of the image by increasing or decreasing the X Rotation angle.
- Change the Y Rotation of the image by increasing or decreasing the Y Rotation angle.
- Zoom in on your image with the Zoom percentage slider.
- After editing your file, click Done to save your changes or click Reset to return the image to its original state.