在長頁面上新增「回到頂端」按鈕
此頁面列印時間為 Jul 27, 2024。如須最新版本,請至 https://help.shopify.com/zh-TW/manual/online-store/themes/themes-by-shopify/vintage-themes/customizing-vintage-themes/add-back-to-top。
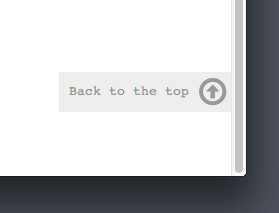
如果您有很長且需要不斷捲動的頁面,則可以在佈景主題中新增「回到頂端」按鈕。
建立「回到頂端」程式碼片段
- 在 Shopify 管理介面 中,前往「線上商店」>「佈景主題」。
- 找到要編輯的佈景主題,按一下「...」按鈕以開啟動作選單,然後點擊「編輯程式碼」。
- 在「程式碼片段」目錄中,按一下「新增程式碼片段」。
- 將程式碼片段命名為
back-to-the-top,然後點擊「建立程式碼片段」。程式碼片段檔案將在程式碼編輯器中開啟。 - 將下列程式碼貼上至您新建立的
back-to-the-top檔案:
{% comment %}
  Reduce below value if you need the back to the top button to appear higher up on the page.
  That value is in pixels.
{% endcomment %}
{% assign vertical_offset_for_trigger = 300 %}

{% comment %}
  Vertical offset from bottom of browser for the position of the button.
{% endcomment %}
{% assign position_from_bottom = '6em' %}

<a id="BackToTop" href="#" title="Back to the top" class="back-to-top hide">
  <span>Back to the top</span> <i class="fa fa-arrow-circle-o-up fa-2x"></i>
</a>
{{ '//netdna.bootstrapcdn.com/font-awesome/4.0.3/css/font-awesome.min.css' | stylesheet_tag }}
<style>
  .back-to-top {
    position: fixed;
    bottom: {{ position_from_bottom }};
    right: 0px;
    text-decoration: none;
    color: #999;
    background-color: #eee;
    font-size: 16px;
    padding: 0.3em;
    -webkit-border-top-left-radius: 3px;
    -webkit-border-bottom-left-radius: 3px;
    -moz-border-radius-topleft: 3px;
    -moz-border-radius-bottomleft: 3px;
    border-top-left-radius: 3px;
    border-bottom-left-radius: 3px;
    z-index: 60000;
  }
  .back-to-top i {
    vertical-align: middle;
  }
  .back-to-top span {
    padding-left: 0.5em;
  }
  .back-to-top i + span {
    padding-left: 0;
  }
  .back-to-top:hover {
    text-decoration: none;
    color: #555;
  }
  .hide {
    display: none!important;
  }
</style>
<script>
    (function() {
    function trackScroll() {
        var scrolled = window.pageYOffset;
        var coords = {{ vertical_offset_for_trigger }};

        if (scrolled > coords) {
        goTopBtn.classList.remove('hide');
        }
        if (scrolled < coords) {
        goTopBtn.classList.add('hide');
        }
    }

    function backToTop() {
        if (window.pageYOffset > 0) {
        window.scrollBy(0, -80);
        setTimeout(backToTop, 0);
        }
    }

    var goTopBtn = document.querySelector('.back-to-top');

    window.addEventListener('scroll', trackScroll);
    goTopBtn.addEventListener('click', backToTop);
    })();
</script>- 點擊「儲存」。
- 在 Shopify 應用程式中,點選「…」按鈕。
- 在銷售管道畫面上,點一下「線上商店」。
- 點一下「管理佈景主題」。
- 找到要編輯的佈景主題,按一下「...」按鈕以開啟動作選單,然後點擊「編輯程式碼」。
- 在「程式碼片段」目錄中,按一下「新增程式碼片段」。
- 將程式碼片段命名為
back-to-the-top,然後點擊「建立程式碼片段」。程式碼片段檔案將在程式碼編輯器中開啟。 - 將下列程式碼貼上至您新建立的
back-to-the-top檔案:
{% comment %}
  Reduce below value if you need the back to the top button to appear higher up on the page.
  That value is in pixels.
{% endcomment %}
{% assign vertical_offset_for_trigger = 300 %}

{% comment %}
  Vertical offset from bottom of browser for the position of the button.
{% endcomment %}
{% assign position_from_bottom = '6em' %}

<a id="BackToTop" href="#" title="Back to the top" class="back-to-top hide">
  <span>Back to the top</span> <i class="fa fa-arrow-circle-o-up fa-2x"></i>
</a>
{{ '//netdna.bootstrapcdn.com/font-awesome/4.0.3/css/font-awesome.min.css' | stylesheet_tag }}
<style>
  .back-to-top {
    position: fixed;
    bottom: {{ position_from_bottom }};
    right: 0px;
    text-decoration: none;
    color: #999;
    background-color: #eee;
    font-size: 16px;
    padding: 0.3em;
    -webkit-border-top-left-radius: 3px;
    -webkit-border-bottom-left-radius: 3px;
    -moz-border-radius-topleft: 3px;
    -moz-border-radius-bottomleft: 3px;
    border-top-left-radius: 3px;
    border-bottom-left-radius: 3px;
    z-index: 60000;
  }
  .back-to-top i {
    vertical-align: middle;
  }
  .back-to-top span {
    padding-left: 0.5em;
  }
  .back-to-top i + span {
    padding-left: 0;
  }
  .back-to-top:hover {
    text-decoration: none;
    color: #555;
  }
  .hide {
    display: none!important;
  }
</style>
<script>
    (function() {
    function trackScroll() {
        var scrolled = window.pageYOffset;
        var coords = {{ vertical_offset_for_trigger }};

        if (scrolled > coords) {
        goTopBtn.classList.remove('hide');
        }
        if (scrolled < coords) {
        goTopBtn.classList.add('hide');
        }
    }

    function backToTop() {
        if (window.pageYOffset > 0) {
        window.scrollBy(0, -80);
        setTimeout(backToTop, 0);
        }
    }

    var goTopBtn = document.querySelector('.back-to-top');

    window.addEventListener('scroll', trackScroll);
    goTopBtn.addEventListener('click', backToTop);
    })();
</script>- 點擊「儲存」。
包含程式碼片段
- 在「版面配置」資料夾中,開啟
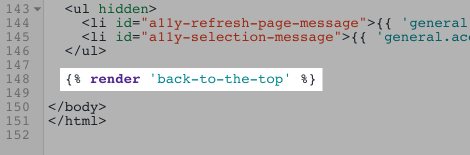
theme.liquid檔案。 - 捲動至檔案最下方。在結束標籤
</body>正上方,貼上此程式碼:
{% render 'back-to-the-top' %}您的程式碼應如下所示:
- 點擊「儲存」。
設定「回到頂端」按鈕 (選用)
若要自訂「回到頂端」按鈕,請點擊此處查看程式碼片段的第一行。
- 若要變更按鈕與瀏覽器最下方的相對位置,請編輯
position_from_bottom值:
{% assign position_from_bottom = '4em' %}- 若要變更顧客在顯示按鈕前需要向下捲動多遠,請編輯
vertical_offset_for_trigger值:
{% assign vertical_offset_for_trigger = 300 %}提示:
vertical_offset_for_trigger數值必須設為無單位,且為像素值。
示範商店
請前往「示範商店」查看此自訂內容的範例。