Voeg een knop Terug naar boven toe op lange pagina's
Deze pagina is afgedrukt op Jul 27, 2024. Ga voor de huidige versie naar https://help.shopify.com/nl/manual/online-store/themes/themes-by-shopify/vintage-themes/customizing-vintage-themes/add-back-to-top.
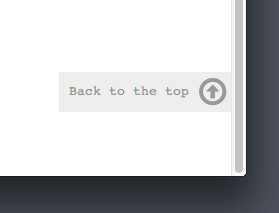
Als je pagina's hebt die lang zijn en waar veel gescrold moet worden, kun je een knop Terug naar boven aan je thema toevoegen.
Op deze pagina
Maak een fragment Terug naar boven aan
- Ga in het Shopify-beheercentrum naar webshop > Thema's.
- Zoek het thema dat je wilt bewerken, klik op de knop … om het actiemenu te openen en klik vervolgens op Code bewerken.
- Klik in de directory Fragmenten op Een nieuw fragment toevoegen.
- Noem je fragment
back-to-the-topen klik vervolgens op Fragment aanmaken. Je fragmentbestand wordt geopend in de code-editor. - Plak de volgende code in je zojuist aangemaakte
back-to-the-top:
{% comment %}
  Reduce below value if you need the back to the top button to appear higher up on the page.
  That value is in pixels.
{% endcomment %}
{% assign vertical_offset_for_trigger = 300 %}

{% comment %}
  Vertical offset from bottom of browser for the position of the button.
{% endcomment %}
{% assign position_from_bottom = '6em' %}

<a id="BackToTop" href="#" title="Back to the top" class="back-to-top hide">
  <span>Back to the top</span> <i class="fa fa-arrow-circle-o-up fa-2x"></i>
</a>
{{ '//netdna.bootstrapcdn.com/font-awesome/4.0.3/css/font-awesome.min.css' | stylesheet_tag }}
<style>
  .back-to-top {
    position: fixed;
    bottom: {{ position_from_bottom }};
    right: 0px;
    text-decoration: none;
    color: #999;
    background-color: #eee;
    font-size: 16px;
    padding: 0.3em;
    -webkit-border-top-left-radius: 3px;
    -webkit-border-bottom-left-radius: 3px;
    -moz-border-radius-topleft: 3px;
    -moz-border-radius-bottomleft: 3px;
    border-top-left-radius: 3px;
    border-bottom-left-radius: 3px;
    z-index: 60000;
  }
  .back-to-top i {
    vertical-align: middle;
  }
  .back-to-top span {
    padding-left: 0.5em;
  }
  .back-to-top i + span {
    padding-left: 0;
  }
  .back-to-top:hover {
    text-decoration: none;
    color: #555;
  }
  .hide {
    display: none!important;
  }
</style>
<script>
    (function() {
    function trackScroll() {
        var scrolled = window.pageYOffset;
        var coords = {{ vertical_offset_for_trigger }};

        if (scrolled > coords) {
        goTopBtn.classList.remove('hide');
        }
        if (scrolled < coords) {
        goTopBtn.classList.add('hide');
        }
    }

    function backToTop() {
        if (window.pageYOffset > 0) {
        window.scrollBy(0, -80);
        setTimeout(backToTop, 0);
        }
    }

    var goTopBtn = document.querySelector('.back-to-top');

    window.addEventListener('scroll', trackScroll);
    goTopBtn.addEventListener('click', backToTop);
    })();
</script>- Klik op Opslaan.
- Tik in de Shopify-app op de knop ….
- Tik in het gedeelte Verkoopkanalen op webshop.
- Tik op Thema's beheren.
- Zoek het thema dat je wilt bewerken, klik op de knop … om het actiemenu te openen en klik vervolgens op Code bewerken.
- Klik in de directory Fragmenten op Een nieuw fragment toevoegen.
- Noem je fragment
back-to-the-topen klik vervolgens op Fragment aanmaken. Je fragmentbestand wordt geopend in de code-editor. - Plak de volgende code in je zojuist aangemaakte
back-to-the-top:
{% comment %}
  Reduce below value if you need the back to the top button to appear higher up on the page.
  That value is in pixels.
{% endcomment %}
{% assign vertical_offset_for_trigger = 300 %}

{% comment %}
  Vertical offset from bottom of browser for the position of the button.
{% endcomment %}
{% assign position_from_bottom = '6em' %}

<a id="BackToTop" href="#" title="Back to the top" class="back-to-top hide">
  <span>Back to the top</span> <i class="fa fa-arrow-circle-o-up fa-2x"></i>
</a>
{{ '//netdna.bootstrapcdn.com/font-awesome/4.0.3/css/font-awesome.min.css' | stylesheet_tag }}
<style>
  .back-to-top {
    position: fixed;
    bottom: {{ position_from_bottom }};
    right: 0px;
    text-decoration: none;
    color: #999;
    background-color: #eee;
    font-size: 16px;
    padding: 0.3em;
    -webkit-border-top-left-radius: 3px;
    -webkit-border-bottom-left-radius: 3px;
    -moz-border-radius-topleft: 3px;
    -moz-border-radius-bottomleft: 3px;
    border-top-left-radius: 3px;
    border-bottom-left-radius: 3px;
    z-index: 60000;
  }
  .back-to-top i {
    vertical-align: middle;
  }
  .back-to-top span {
    padding-left: 0.5em;
  }
  .back-to-top i + span {
    padding-left: 0;
  }
  .back-to-top:hover {
    text-decoration: none;
    color: #555;
  }
  .hide {
    display: none!important;
  }
</style>
<script>
    (function() {
    function trackScroll() {
        var scrolled = window.pageYOffset;
        var coords = {{ vertical_offset_for_trigger }};

        if (scrolled > coords) {
        goTopBtn.classList.remove('hide');
        }
        if (scrolled < coords) {
        goTopBtn.classList.add('hide');
        }
    }

    function backToTop() {
        if (window.pageYOffset > 0) {
        window.scrollBy(0, -80);
        setTimeout(backToTop, 0);
        }
    }

    var goTopBtn = document.querySelector('.back-to-top');

    window.addEventListener('scroll', trackScroll);
    goTopBtn.addEventListener('click', backToTop);
    })();
</script>- Klik op Opslaan.
Voeg je fragment toe
- Open in de map Opmaak het
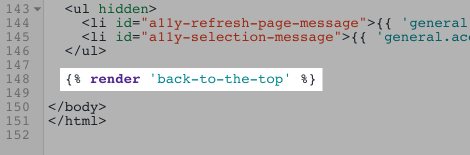
theme.liquid-bestand. - Blader naar de onderkant van het bestand. Plak deze code boven
</body>de laatste tag:
{% render 'back-to-the-top' %}Je code ziet er als volgende uit:
- Klik op Opslaan.
Configureer de knop Terug naar boven (optioneel)
Om je knop Terug naar boven aan te passen, klik je hier en bekijk je de eerste regels van je fragment.
- Bewerk de waarde
position_from_bottomom de positie van je knop ten opzichte van de onderkant van de browser te wijzigen:
{% assign position_from_bottom = '4em' %}- Bewerk de
vertical_offset_for_trigger-waarde als je wilt wijzigen hoe ver naar beneden een klant moet scrollen voordat de knop wordt getoond:
{% assign vertical_offset_for_trigger = 300 %}Demowinkel
Ga naar de demowinkel om een voorbeeld van deze aanpassing te bekijken.