縦長ページの「トップに戻る」ボタンを追加する
このページはJul 27, 2024に印刷されています。最新のバージョンについては、https://help.shopify.com/ja/manual/online-store/themes/themes-by-shopify/vintage-themes/customizing-vintage-themes/add-back-to-topをご覧ください。
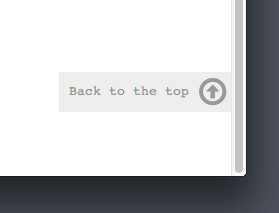
縦長で多くのスクロールが必要なページがある場合、テーマに、[トップに戻る] ボタンを追加できます。
「トップに戻る」のスニペットを作成する
- 管理画面から [オンラインストア] > [テーマ] に移動します。
- 編集するテーマを見つけて、[...] ボタンをクリックしてアクションメニューを開き、[コードを編集する] をクリックします。
- スニペットディレクトリーで、[新しいスニペットを追加する] をクリックします。
- スニペットに
back-to-the-topと名付け、[スニペットを作成する] をクリックします。スニペットファイルがコードエディタで開きます。 - 新しく作成した
back-to-the-topファイルに、次のコードを貼り付けます。
{% comment %}
  Reduce below value if you need the back to the top button to appear higher up on the page.
  That value is in pixels.
{% endcomment %}
{% assign vertical_offset_for_trigger = 300 %}

{% comment %}
  Vertical offset from bottom of browser for the position of the button.
{% endcomment %}
{% assign position_from_bottom = '6em' %}

<a id="BackToTop" href="#" title="Back to the top" class="back-to-top hide">
  <span>Back to the top</span> <i class="fa fa-arrow-circle-o-up fa-2x"></i>
</a>
{{ '//netdna.bootstrapcdn.com/font-awesome/4.0.3/css/font-awesome.min.css' | stylesheet_tag }}
<style>
  .back-to-top {
    position: fixed;
    bottom: {{ position_from_bottom }};
    right: 0px;
    text-decoration: none;
    color: #999;
    background-color: #eee;
    font-size: 16px;
    padding: 0.3em;
    -webkit-border-top-left-radius: 3px;
    -webkit-border-bottom-left-radius: 3px;
    -moz-border-radius-topleft: 3px;
    -moz-border-radius-bottomleft: 3px;
    border-top-left-radius: 3px;
    border-bottom-left-radius: 3px;
    z-index: 60000;
  }
  .back-to-top i {
    vertical-align: middle;
  }
  .back-to-top span {
    padding-left: 0.5em;
  }
  .back-to-top i + span {
    padding-left: 0;
  }
  .back-to-top:hover {
    text-decoration: none;
    color: #555;
  }
  .hide {
    display: none!important;
  }
</style>
<script>
    (function() {
    function trackScroll() {
        var scrolled = window.pageYOffset;
        var coords = {{ vertical_offset_for_trigger }};

        if (scrolled > coords) {
        goTopBtn.classList.remove('hide');
        }
        if (scrolled < coords) {
        goTopBtn.classList.add('hide');
        }
    }

    function backToTop() {
        if (window.pageYOffset > 0) {
        window.scrollBy(0, -80);
        setTimeout(backToTop, 0);
        }
    }

    var goTopBtn = document.querySelector('.back-to-top');

    window.addEventListener('scroll', trackScroll);
    goTopBtn.addEventListener('click', backToTop);
    })();
</script>- [保存] をクリックします。
- Shopifyアプリで [...] ボタンをタップします。
- 販売チャネルセクションで、[オンラインストア] をタップします。
- [テーマを管理する] をタップします。
- 編集するテーマを見つけて、[...] ボタンをクリックしてアクションメニューを開き、[コードを編集する] をクリックします。
- スニペットディレクトリーで、[新しいスニペットを追加する] をクリックします。
- スニペットに
back-to-the-topと名付け、[スニペットを作成する] をクリックします。スニペットファイルがコードエディタで開きます。 - 新しく作成した
back-to-the-topファイルに、次のコードを貼り付けます。
{% comment %}
  Reduce below value if you need the back to the top button to appear higher up on the page.
  That value is in pixels.
{% endcomment %}
{% assign vertical_offset_for_trigger = 300 %}

{% comment %}
  Vertical offset from bottom of browser for the position of the button.
{% endcomment %}
{% assign position_from_bottom = '6em' %}

<a id="BackToTop" href="#" title="Back to the top" class="back-to-top hide">
  <span>Back to the top</span> <i class="fa fa-arrow-circle-o-up fa-2x"></i>
</a>
{{ '//netdna.bootstrapcdn.com/font-awesome/4.0.3/css/font-awesome.min.css' | stylesheet_tag }}
<style>
  .back-to-top {
    position: fixed;
    bottom: {{ position_from_bottom }};
    right: 0px;
    text-decoration: none;
    color: #999;
    background-color: #eee;
    font-size: 16px;
    padding: 0.3em;
    -webkit-border-top-left-radius: 3px;
    -webkit-border-bottom-left-radius: 3px;
    -moz-border-radius-topleft: 3px;
    -moz-border-radius-bottomleft: 3px;
    border-top-left-radius: 3px;
    border-bottom-left-radius: 3px;
    z-index: 60000;
  }
  .back-to-top i {
    vertical-align: middle;
  }
  .back-to-top span {
    padding-left: 0.5em;
  }
  .back-to-top i + span {
    padding-left: 0;
  }
  .back-to-top:hover {
    text-decoration: none;
    color: #555;
  }
  .hide {
    display: none!important;
  }
</style>
<script>
    (function() {
    function trackScroll() {
        var scrolled = window.pageYOffset;
        var coords = {{ vertical_offset_for_trigger }};

        if (scrolled > coords) {
        goTopBtn.classList.remove('hide');
        }
        if (scrolled < coords) {
        goTopBtn.classList.add('hide');
        }
    }

    function backToTop() {
        if (window.pageYOffset > 0) {
        window.scrollBy(0, -80);
        setTimeout(backToTop, 0);
        }
    }

    var goTopBtn = document.querySelector('.back-to-top');

    window.addEventListener('scroll', trackScroll);
    goTopBtn.addEventListener('click', backToTop);
    })();
</script>- [保存] をクリックします。
スニペットを含める
-
[レイアウト] フォルダで、
theme.liquidファイルを開きます。 - ファイルの下部までスクロールします。
</body>終了タグのすぐ上に、次のコードを貼り付けます。
{% render 'back-to-the-top' %}コードは次のように表示されます。
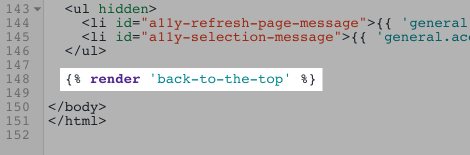
- [保存] をクリックします。
「トップに戻る」ボタンを設定します (オプション)
「トップに戻る」ボタンをカスタマイズするには、こちらをクリックして、スニペットの最初の行を確認します。
- ブラウザの下部を基準としたボタンの位置を変更するには、次のように
position_from_bottomの値を編集します。
{% assign position_from_bottom = '4em' %}- ボタンが現れるまでにお客様が下にスクロールする必要がある距離を変更するには、次のように
vertical_offset_for_trigger値を編集します。
{% assign vertical_offset_for_trigger = 300 %}ヒント:
vertical_offset_for_trigger値は単位を使用せずに設定し、ピクセル値である必要があります。
デモストア
デモストアにアクセスし、このカスタマイズの例を確認します。