Schaltfläche "Zurück nach oben" auf langen Seiten hinzufügen
Diese Seite wurde gedruckt um Jul 27, 2024. Die neueste Version findest du unter https://help.shopify.com/de/manual/online-store/themes/themes-by-shopify/vintage-themes/customizing-vintage-themes/add-back-to-top.
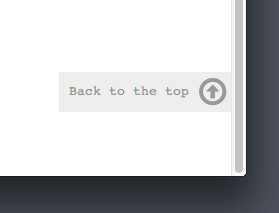
Wenn du Seiten hast, die lang sind und viel Scrollen erfordern, kannst du deinem Theme die Schaltfläche Zurück nach oben hinzufügen.
Auf dieser Seite
Snippet back-to-the-top erstellen
- Gehe im Shopify-Adminbereich zu Onlineshop > Themes.
- Suche das Theme, das du bearbeiten möchtest, klicke auf die Schaltfläche ..., um das Aktionsmenü zu öffnen, und klicke dann auf Code bearbeiten.
- Klicke in der Übersicht Snippets auf Neues Snippet hinzufügen.
- Benenne dein Snippet
back-to-the-topund klicke auf Snippet erstellen. Die Snippet-Datei wird im Code-Editor geöffnet. - Füge den folgenden Code in die neu erstellte Datei
back-to-the-topein:
{% comment %}
  Reduce below value if you need the back to the top button to appear higher up on the page.
  That value is in pixels.
{% endcomment %}
{% assign vertical_offset_for_trigger = 300 %}

{% comment %}
  Vertical offset from bottom of browser for the position of the button.
{% endcomment %}
{% assign position_from_bottom = '6em' %}

<a id="BackToTop" href="#" title="Back to the top" class="back-to-top hide">
  <span>Back to the top</span> <i class="fa fa-arrow-circle-o-up fa-2x"></i>
</a>
{{ '//netdna.bootstrapcdn.com/font-awesome/4.0.3/css/font-awesome.min.css' | stylesheet_tag }}
<style>
  .back-to-top {
    position: fixed;
    bottom: {{ position_from_bottom }};
    right: 0px;
    text-decoration: none;
    color: #999;
    background-color: #eee;
    font-size: 16px;
    padding: 0.3em;
    -webkit-border-top-left-radius: 3px;
    -webkit-border-bottom-left-radius: 3px;
    -moz-border-radius-topleft: 3px;
    -moz-border-radius-bottomleft: 3px;
    border-top-left-radius: 3px;
    border-bottom-left-radius: 3px;
    z-index: 60000;
  }
  .back-to-top i {
    vertical-align: middle;
  }
  .back-to-top span {
    padding-left: 0.5em;
  }
  .back-to-top i + span {
    padding-left: 0;
  }
  .back-to-top:hover {
    text-decoration: none;
    color: #555;
  }
  .hide {
    display: none!important;
  }
</style>
<script>
    (function() {
    function trackScroll() {
        var scrolled = window.pageYOffset;
        var coords = {{ vertical_offset_for_trigger }};

        if (scrolled > coords) {
        goTopBtn.classList.remove('hide');
        }
        if (scrolled < coords) {
        goTopBtn.classList.add('hide');
        }
    }

    function backToTop() {
        if (window.pageYOffset > 0) {
        window.scrollBy(0, -80);
        setTimeout(backToTop, 0);
        }
    }

    var goTopBtn = document.querySelector('.back-to-top');

    window.addEventListener('scroll', trackScroll);
    goTopBtn.addEventListener('click', backToTop);
    })();
</script>- Klicke auf Speichern.
- Tippe in der Shopify-App auf die Schaltfläche ....
- Klicke im Bereich Vertriebskanäle auf Onlineshop.
- Tippe auf Themes verwalten.
- Suche das Theme, das du bearbeiten möchtest, klicke auf die Schaltfläche ..., um das Aktionsmenü zu öffnen, und klicke dann auf Code bearbeiten.
- Klicke in der Übersicht Snippets auf Neues Snippet hinzufügen.
- Benenne dein Snippet
back-to-the-topund klicke auf Snippet erstellen. Die Snippet-Datei wird im Code-Editor geöffnet. - Füge den folgenden Code in die neu erstellte Datei
back-to-the-topein:
{% comment %}
  Reduce below value if you need the back to the top button to appear higher up on the page.
  That value is in pixels.
{% endcomment %}
{% assign vertical_offset_for_trigger = 300 %}

{% comment %}
  Vertical offset from bottom of browser for the position of the button.
{% endcomment %}
{% assign position_from_bottom = '6em' %}

<a id="BackToTop" href="#" title="Back to the top" class="back-to-top hide">
  <span>Back to the top</span> <i class="fa fa-arrow-circle-o-up fa-2x"></i>
</a>
{{ '//netdna.bootstrapcdn.com/font-awesome/4.0.3/css/font-awesome.min.css' | stylesheet_tag }}
<style>
  .back-to-top {
    position: fixed;
    bottom: {{ position_from_bottom }};
    right: 0px;
    text-decoration: none;
    color: #999;
    background-color: #eee;
    font-size: 16px;
    padding: 0.3em;
    -webkit-border-top-left-radius: 3px;
    -webkit-border-bottom-left-radius: 3px;
    -moz-border-radius-topleft: 3px;
    -moz-border-radius-bottomleft: 3px;
    border-top-left-radius: 3px;
    border-bottom-left-radius: 3px;
    z-index: 60000;
  }
  .back-to-top i {
    vertical-align: middle;
  }
  .back-to-top span {
    padding-left: 0.5em;
  }
  .back-to-top i + span {
    padding-left: 0;
  }
  .back-to-top:hover {
    text-decoration: none;
    color: #555;
  }
  .hide {
    display: none!important;
  }
</style>
<script>
    (function() {
    function trackScroll() {
        var scrolled = window.pageYOffset;
        var coords = {{ vertical_offset_for_trigger }};

        if (scrolled > coords) {
        goTopBtn.classList.remove('hide');
        }
        if (scrolled < coords) {
        goTopBtn.classList.add('hide');
        }
    }

    function backToTop() {
        if (window.pageYOffset > 0) {
        window.scrollBy(0, -80);
        setTimeout(backToTop, 0);
        }
    }

    var goTopBtn = document.querySelector('.back-to-top');

    window.addEventListener('scroll', trackScroll);
    goTopBtn.addEventListener('click', backToTop);
    })();
</script>- Klicke auf Speichern.
Snippet einschließen
- Öffne im Verzeichnis Layout die Datei
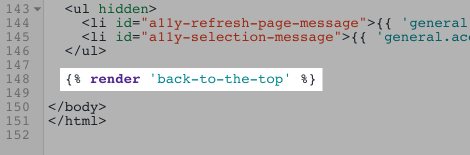
theme.liquid. - Scrolle zum Ende der Datei. Füge direkt über dem abschließenden Tag
</body>diesen Code ein:
{% render 'back-to-the-top' %}Dein Code sollte so aussehen:
- Klicke auf Speichern.
Schaltfläche "Zurück nach oben" konfigurieren (optional)
Um die Schaltfläche "Zurück nach oben" anzupassen, klicke hier und schau dir die ersten Zeilen des Snippets an.
- Um die Position der Schaltfläche basierend auf dem unteren Rand des Browsers zu ändern, bearbeite den Wert
position_from_bottom:
{% assign position_from_bottom = '4em' %}- Um zu ändern, wie weit nach unten ein Kunde scrollen muss, bevor die Schaltfläche angezeigt wird, bearbeite den Wert
vertical_offset_for_trigger:
{% assign vertical_offset_for_trigger = 300 %}Demo-Shop
Öffne den Demo-Shop, um ein Beispiel für diese Anpassung anzuzeigen.