向产品页面添加尺寸图表
如果您销售服装商品并需要客户在购买前了解自己的尺码,您可以向产品页面添加自定义尺码表。
需要参考尺寸图表的所有产品必须具有尺寸选项: 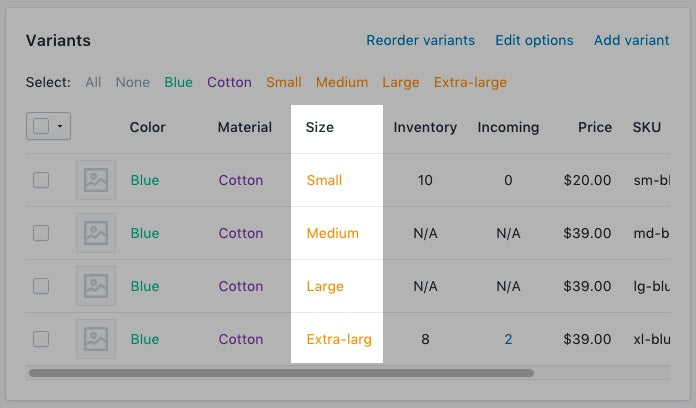
本页相关主题
创建尺寸图表页面
- 在 Shopify 后台中,转至在线商店 > 页面。
- 点击添加页面。
-
输入页面标题。
- 如果要创建适应网站宽度的尺寸图表,请对页面标题输入
Size Chart。在搜索引擎产品页面预览*分区中,页面的 URL 应以/size-chart结尾。 - 如果您想创建仅对特定厂商的产品显示的图表,请输入厂商名称,后跟
Size Chart。
例如,如果您的厂商为 Great Owls,则对页面标题输入Great Owls Size Chart。在搜索引擎产品页面预览分区中,页面的 URL 应以/great-owls-size-chart结尾。 - 如果您要创建仅对特定产品类型显示的图表,请输入产品类型,后跟
Size Chart。
例如,如果要显示特定于鞋子的尺寸图表,请对页面标题输入Shoes Size Chart。在搜索引擎产品页面预览分区中,页面的 URL 应以/shoes-size-chart结尾。
- 如果要创建适应网站宽度的尺寸图表,请对页面标题输入
在内容框中创建一个表,用于包含尺寸图表信息。按所需呈现效果对表格进行自定义:

在可见性分区中,确保将页面设置为可见。
点击保存。
- 在 Shopify 应用中,点击 … 按钮。
- 在销售渠道部分,轻触在线商店。
- 轻触页面。
- 点击添加页面。
-
输入页面标题。
- 如果要创建适应网站宽度的尺寸图表,请对页面标题输入
Size Chart。在搜索引擎产品页面预览*分区中,页面的 URL 应以/size-chart结尾。 - 如果您想创建仅对特定厂商的产品显示的图表,请输入厂商名称,后跟
Size Chart。
例如,如果您的厂商为 Great Owls,则对页面标题输入Great Owls Size Chart。在搜索引擎产品页面预览分区中,页面的 URL 应以/great-owls-size-chart结尾。 - 如果您要创建仅对特定产品类型显示的图表,请输入产品类型,后跟
Size Chart。
例如,如果要显示特定于鞋子的尺寸图表,请对页面标题输入Shoes Size Chart。在搜索引擎产品页面预览分区中,页面的 URL 应以/shoes-size-chart结尾。
- 如果要创建适应网站宽度的尺寸图表,请对页面标题输入
在内容框中创建一个表,用于包含尺寸图表信息。按所需呈现效果对表格进行自定义:
在可见性分区中,确保将页面设置为可见。
点击保存。
导航到代码编辑器
- 在 Shopify 后台中,转至在线商店 > 模板。
- 找到要编辑的模板,点击 ... 按钮打开操作菜单,然后点击编辑代码。
- 在 Shopify 应用中,点击 … 按钮。
- 在销售渠道部分,轻触在线商店。
- 轻触管理模板。
- 找到要编辑的模板,点击 ... 按钮打开操作菜单,然后点击编辑代码。
- 在 Shopify 应用中,点击 … 按钮。
- 在销售渠道部分,轻触在线商店。
- 轻触管理模板。
- 找到要编辑的模板,点击 ... 按钮打开操作菜单,然后点击编辑代码。
选择以下内容之一,然后创建尺寸图表代码片段
创建尺寸图表代码片段
- 在 Snippets 目录中点击添加新片段。
将代码片段命名为
size-chart,然后点击创建代码片段:将以下内容复制到您的
size-chart代码片段中:
<div class="pop-up-modal">
<div class="pop-up-content">
<span class="close-button">×</span>
<span class="size-chart-content">{{ pages.size-chart.content }}</span>
</div>
</div>
<script>
const modal = document.querySelector('.pop-up-modal');
const trigger = document.querySelector('.trigger-pop-up');
const closeButton = document.querySelector('.close-button');
function toggleModal() {
modal.classList.toggle('show-pop-up');
}
function windowOnClick(event) {
if (event.target === modal) {
toggleModal();
}
}
trigger.addEventListener('click', toggleModal);
closeButton.addEventListener('click', toggleModal);
window.addEventListener('click', windowOnClick);
</script>
<style>
.pop-up-modal {
position: fixed;
left: 0;
top: 0;
width: 100%;
height: 100%;
background-color: rgba(0, 0, 0, 0.5);
opacity: 0;
display: none;
transform: scale(1.1);
transition: visibility 0s linear 0.25s, opacity 0.25s 0s, transform 0.25s;
overflow:auto;
}
.pop-up-content {
position: absolute;
top: 8%;
left: 50%;
transform: translate(-50%, 0);
background-color: white;
padding: 1rem 1.5rem;
width: auto;
border-radius: 0.5rem;
}
.pop-up-content table {
table-layout: auto;
}
.close-button {
float: right;
width: 1.5rem;
line-height: 1.5rem;
text-align: center;
cursor: pointer;
border-radius: 0.25rem;
background-color: lightgray;
}
.close-button:hover {
background-color: darkgray;
}
.show-pop-up {
z-index: 12;
opacity: 1;
display: block;
transform: scale(1);
transition: visibility 0s linear 0s, opacity 0.25s 0s, transform 0.25s;
}
.trigger-pop-up {
margin: 10px 0 10px 0;
width: 100%;
}
@media only screen and (max-width: 749px) {
.pop-up-content,
.size-chart-content table {
width: 100%;
}
.size-chart-content th,
.size-chart-content td {
padding: 10px;
}
}
</style>{% block "note" %} 需要针对模板 Simple 和 Minimal 的 CSS 样式执行一些更改。{% endblock %}
如果您使用的是 Simple 模板,请使用此代码:
<div class="pop-up-modal">
<div class="pop-up-content">
<span class="close-button">×</span>
<span class="size-chart-content">{{ pages.size-chart.content }}</span>
</div>
</div>
<script>
const modal = document.querySelector('.pop-up-modal');
const trigger = document.querySelector('.trigger-pop-up');
const closeButton = document.querySelector('.close-button');
function toggleModal() {
modal.classList.toggle('show-pop-up');
}
function windowOnClick(event) {
if (event.target === modal) {
toggleModal();
}
}
trigger.addEventListener('click', toggleModal);
closeButton.addEventListener('click', toggleModal);
window.addEventListener('click', windowOnClick);
</script>
<style>
.pop-up-modal {
position: fixed;
left: 0;
top: 0;
width: 100%;
height: 100%;
background-color: rgba(0, 0, 0, 0.5);
opacity: 0;
display: none;
transform: scale(1.1);
transition: visibility 0s linear 0.25s, opacity 0.25s 0s, transform 0.25s;
overflow:auto;
}
.pop-up-content {
position: absolute;
top: 8%;
left: 50%;
transform: translate(-50%, 0);
background-color: white;
padding: 1rem 1.5rem;
width: auto;
border-radius: 0.5rem;
}
.pop-up-content table {
table-layout: auto;
}
.close-button {
float: right;
width: 1.5rem;
line-height: 1.5rem;
text-align: center;
cursor: pointer;
border-radius: 0.25rem;
background-color: lightgray;
}
.close-button:hover {
background-color: darkgray;
}
.show-pop-up {
z-index: 12;
opacity: 1;
display: block;
transform: scale(1);
transition: visibility 0s linear 0s, opacity 0.25s 0s, transform 0.25s;
}
.trigger-pop-up {
margin: 10px 0 10px 8px;
width: 50%;
}
@media only screen and (max-width: 749px) {
.pop-up-content,
.size-chart-content table {
width: 100%;
}
.size-chart-content th,
.size-chart-content td {
padding: 10px;
}
.trigger-pop-up {
width: 100%;
}
}
</style>如果您使用的是 Minimal 模板,请使用以下代码:
<div class="pop-up-modal">
<div class="pop-up-content">
<span class="close-button">×</span>
<span class="size-chart-content">{{ pages.size-chart.content }}</span>
</div>
</div>
<script>
const modal = document.querySelector('.pop-up-modal');
const trigger = document.querySelector('.trigger-pop-up');
const closeButton = document.querySelector('.close-button');
function toggleModal() {
modal.classList.toggle('show-pop-up');
}
function windowOnClick(event) {
if (event.target === modal) {
toggleModal();
}
}
trigger.addEventListener('click', toggleModal);
closeButton.addEventListener('click', toggleModal);
window.addEventListener('click', windowOnClick);
</script>
<style>
.pop-up-modal {
position: fixed;
left: 0;
top: 0;
width: 100%;
height: 100%;
background-color: rgba(0, 0, 0, 0.5);
opacity: 0;
display: none;
transform: scale(1.1);
transition: visibility 0s linear 0.25s, opacity 0.25s 0s, transform 0.25s;
overflow:auto;
}
.pop-up-content {
position: absolute;
top: 8%;
left: 50%;
transform: translate(-50%, 0);
background-color: white;
padding: 1rem 1.5rem;
width: auto;
border-radius: 0.5rem;
}
.pop-up-content table {
table-layout: auto;
}
.close-button {
float: right;
width: 1.5rem;
line-height: 1.5rem;
text-align: center;
cursor: pointer;
border-radius: 0.25rem;
background-color: lightgray;
}
.close-button:hover {
background-color: darkgray;
}
.show-pop-up {
z-index: 12;
opacity: 1;
display: block;
transform: scale(1);
transition: visibility 0s linear 0s, opacity 0.25s 0s, transform 0.25s;
}
.trigger-pop-up {
margin: 10px 0 10px 0;
width: 100%;
}
@media only screen and (max-width: 749px) {
.pop-up-content,
.size-chart-content table {
width: 100%;
}
.size-chart-content th,
.size-chart-content td {
padding: 10px;
}
}
@media only screen and (min-width: 750px) {
.trigger-pop-up {
width: 50%;
}
}
</style>将尺寸图表代码片段添加到您的 theme.liquid 中
- 在 Layout 目录中,点击打开您的
theme.liquid文件。 - 找到结束
</body>标记。在结束</body>标记正上方粘贴以下代码:
{% if request.page_type == 'product' %}
    {% if product.options contains 'Size' %}
        {% render 'size-chart' %}
    {% endif %}
{% endif %}添加尺寸图表按钮
- 在 Sections 目录中,点击打开
product-template.liquid文件,如果没有product-template.liquid文件,则点击打开product.liquid文件。 - 将以下代码粘贴到添加到购物车按钮上方:
{% if product.options contains 'Size' %}
    <a class="trigger-pop-up btn">See Size Chart</a>
{% endif %}
“添加到购物车”按钮的代码通常以 <button type="submit" name="add" 开头。如果您商店的运营语言不是英语,请将 See Size Chart 替换为您首选使用的文本。
创建尺寸图表代码片段
- 在 Snippets 目录中点击添加新片段。
将代码片段命名为
size-chart,然后点击创建代码片段:将以下内容复制到您的
size-chart代码片段中:
{% assign chart = product.type | handleize | append: "-size-chart" %} {% unless
pages[chart].empty? or pages[chart].content == blank %}
<div class="pop-up-modal">
<div class="pop-up-content">
<span class="close-button">×</span>
<span class="size-chart-content">{{ pages[chart].content }}</span>
</div>
</div>
{% endunless %}
<script>
const modal = document.querySelector('.pop-up-modal');
const trigger = document.querySelector('.trigger-pop-up');
const closeButton = document.querySelector('.close-button');
function toggleModal() {
modal.classList.toggle('show-pop-up');
}
function windowOnClick(event) {
if (event.target === modal) {
toggleModal();
}
}
trigger.addEventListener('click', toggleModal);
closeButton.addEventListener('click', toggleModal);
window.addEventListener('click', windowOnClick);
</script>
<style>
.pop-up-modal {
position: fixed;
left: 0;
top: 0;
width: 100%;
height: 100%;
background-color: rgba(0, 0, 0, 0.5);
opacity: 0;
display: none;
transform: scale(1.1);
transition: visibility 0s linear 0.25s, opacity 0.25s 0s, transform 0.25s;
overflow:auto;
}
.pop-up-content {
position: absolute;
top: 8%;
left: 50%;
transform: translate(-50%, 0);
background-color: white;
padding: 1rem 1.5rem;
width: auto;
border-radius: 0.5rem;
}
.pop-up-content table {
table-layout: auto;
}
.close-button {
float: right;
width: 1.5rem;
line-height: 1.5rem;
text-align: center;
cursor: pointer;
border-radius: 0.25rem;
background-color: lightgray;
}
.close-button:hover {
background-color: darkgray;
}
.show-pop-up {
z-index: 12;
opacity: 1;
display: block;
transform: scale(1);
transition: visibility 0s linear 0s, opacity 0.25s 0s, transform 0.25s;
}
.trigger-pop-up {
margin: 10px 0 10px 0;
width: 100%;
}
@media only screen and (max-width: 749px) {
.pop-up-content,
.size-chart-content table {
width: 100%;
}
.size-chart-content th,
.size-chart-content td {
padding: 10px;
}
}
</style>如果您在使用模板 Simple,请将从 .trigger-pop-up 直到 </style> 上方的内容替换为以下代码:
.trigger-pop-up {
  margin: 10px 0 10px 8px;
  width: 50%;
}
@media only screen and (max-width: 749px) {
  .pop-up-content,
  .size-chart-content table {
    width: 100%;
  }
  .size-chart-content th,
  .size-chart-content td {
    padding: 10px;
  }
  .trigger-pop-up {
    width: 100%;
  }
}
如果您要使用 Minimal 模板,请在结束 </style> 标记上方添加以下代码:
@media only screen and (min-width: 750px) {
  .trigger-pop-up {
    width: 50%;
  }
}
将尺寸图表代码片段添加到您的 theme.liquid 中
- 在 Layout 目录中,点击打开您的
theme.liquid文件。 - 找到结束
</body>标记。在结束</body>标记正上方粘贴以下代码:
{% if request.page_type == 'product' %}
    {% if product.options contains 'Size' %}
      {% assign chart = product.type | handleize | append: "-size-chart" %}
      {% unless pages[chart].empty? or pages[chart].content == blank %}
        {% render 'size-chart' %}
      {% endunless %}
    {% endif %}
{% endif %}添加尺寸图表按钮
- 在 Sections 目录中,点击打开
product-template.liquid文件,如果没有product-template.liquid文件,则点击打开product.liquid文件。 - 将以下代码粘贴到添加到购物车按钮上方:
{% if product.options contains 'Size' %}
      {% assign chart = product.type | handleize | append: "-size-chart" %}
      {% unless pages[chart].empty? or pages[chart].content == blank %}
        <a class="trigger-pop-up btn">See Size Chart</a>
      {% endunless %}
    {% endif %}
“添加到购物车”按钮的代码通常以 <button type="submit" name="add" 开头。如果您商店的运营语言不是英语,请将 See Size Chart 替换为您首选使用的文本。
创建尺寸图表代码片段
- 在 Snippets 目录中点击添加新片段。
将代码片段命名为
size-chart,然后点击创建代码片段:将以下内容复制到您的
size-chart代码片段中:
{% assign chart = product.vendor | handleize | append: "-size-chart" %} {%
unless pages[chart].empty? or pages[chart].content == blank %}
<div class="pop-up-modal">
<div class="pop-up-content">
<span class="close-button">×</span>
<span class="size-chart-content">{{ pages[chart].content }}</span>
</div>
</div>
{% endunless %}
<script>
const modal = document.querySelector('.pop-up-modal');
const trigger = document.querySelector('.trigger-pop-up');
const closeButton = document.querySelector('.close-button');
function toggleModal() {
modal.classList.toggle('show-pop-up');
}
function windowOnClick(event) {
if (event.target === modal) {
toggleModal();
}
}
trigger.addEventListener('click', toggleModal);
closeButton.addEventListener('click', toggleModal);
window.addEventListener('click', windowOnClick);
</script>
<style>
.pop-up-modal {
position: fixed;
left: 0;
top: 0;
width: 100%;
height: 100%;
background-color: rgba(0, 0, 0, 0.5);
opacity: 0;
display: none;
transform: scale(1.1);
transition: visibility 0s linear 0.25s, opacity 0.25s 0s, transform 0.25s;
overflow:auto;
}
.pop-up-content {
position: absolute;
top: 8%;
left: 50%;
transform: translate(-50%, 0);
background-color: white;
padding: 1rem 1.5rem;
width: auto;
border-radius: 0.5rem;
}
.pop-up-content table {
table-layout: auto;
}
.close-button {
float: right;
width: 1.5rem;
line-height: 1.5rem;
text-align: center;
cursor: pointer;
border-radius: 0.25rem;
background-color: lightgray;
}
.close-button:hover {
background-color: darkgray;
}
.show-pop-up {
z-index: 12;
opacity: 1;
display: block;
transform: scale(1);
transition: visibility 0s linear 0s, opacity 0.25s 0s, transform 0.25s;
}
.trigger-pop-up {
margin: 10px 0 10px 0;
width: 100%;
}
@media only screen and (max-width: 749px) {
.pop-up-content,
.size-chart-content table {
width: 100%;
}
.size-chart-content th,
.size-chart-content td {
padding: 10px;
}
}
</style>如果您在使用模板 Simple,请将从 .trigger-pop-up 直到 </style> 上方的内容替换为以下代码:
.trigger-pop-up {
  margin: 10px 0 10px 8px;
  width: 50%;
}
@media only screen and (max-width: 749px) {
  .pop-up-content,
  .size-chart-content table {
    width: 100%;
  }
  .size-chart-content th,
  .size-chart-content td {
    padding: 10px;
  }
  .trigger-pop-up {
    width: 100%;
  }
}
如果您要使用 Minimal 模板,请在结束 </style> 标记上方添加以下代码:
@media only screen and (min-width: 750px) {
  .trigger-pop-up {
    width: 50%;
  }
}
将尺寸图表代码片段添加到您的 theme.liquid 中
- 在 Layout 目录中,点击打开您的
theme.liquid文件。 - 找到结束
</body>标记。在结束</body>标记正上方粘贴以下代码:
{% if request.page_type == 'product' %}
    {% if product.options contains 'Size' %}
      {% assign chart = product.vendor | handleize | append: "-size-chart" %}
      {% unless pages[chart].empty? or pages[chart].content == blank %}
        {% render 'size-chart' %}
      {% endunless %}
    {% endif %}
{% endif %}添加尺寸图表按钮
- 在 Sections 目录中,点击打开
product-template.liquid文件,如果没有product-template.liquid文件,则点击打开product.liquid文件。 - 将以下代码粘贴到添加到购物车按钮上方:
{% if product.options contains 'Size' %}
      {% assign chart = product.vendor | handleize | append: "-size-chart" %}
      {% unless pages[chart].empty? or pages[chart].content == blank %}
        <a class="trigger-pop-up btn">See Size Chart</a>
      {% endunless %}
    {% endif %}
“添加到购物车”按钮的代码通常以 <button type="submit" name="add" 开头。如果您商店的运营语言不是英语,请将 See Size Chart 替换为您首选使用的文本。